Prepare a Page for an Easy Sequence
Gather plain paper and a familiar pencil, crayon, or marker. A pencil makes adjustments easier, while a marker can help a child commit to loose, confident lines. Use whichever tool feels comfortable today. Leave enough space around the first shape for the rest of the subject. Before drawing, point to where its top, bottom, and widest parts might reach. That quick check can prevent a long tail or tall roof from running unexpectedly off the page.
Read or demonstrate only the next useful stage. A child does not need to remember the entire sequence before starting. Draw your own version on separate paper, then wait while the child decides where their next line belongs. If they choose a different shape, adapt the later stages to it. The tutorial provides a structure for beginning, and the child’s variations provide the character of the result.
Draw a Turtle From a Broad Oval
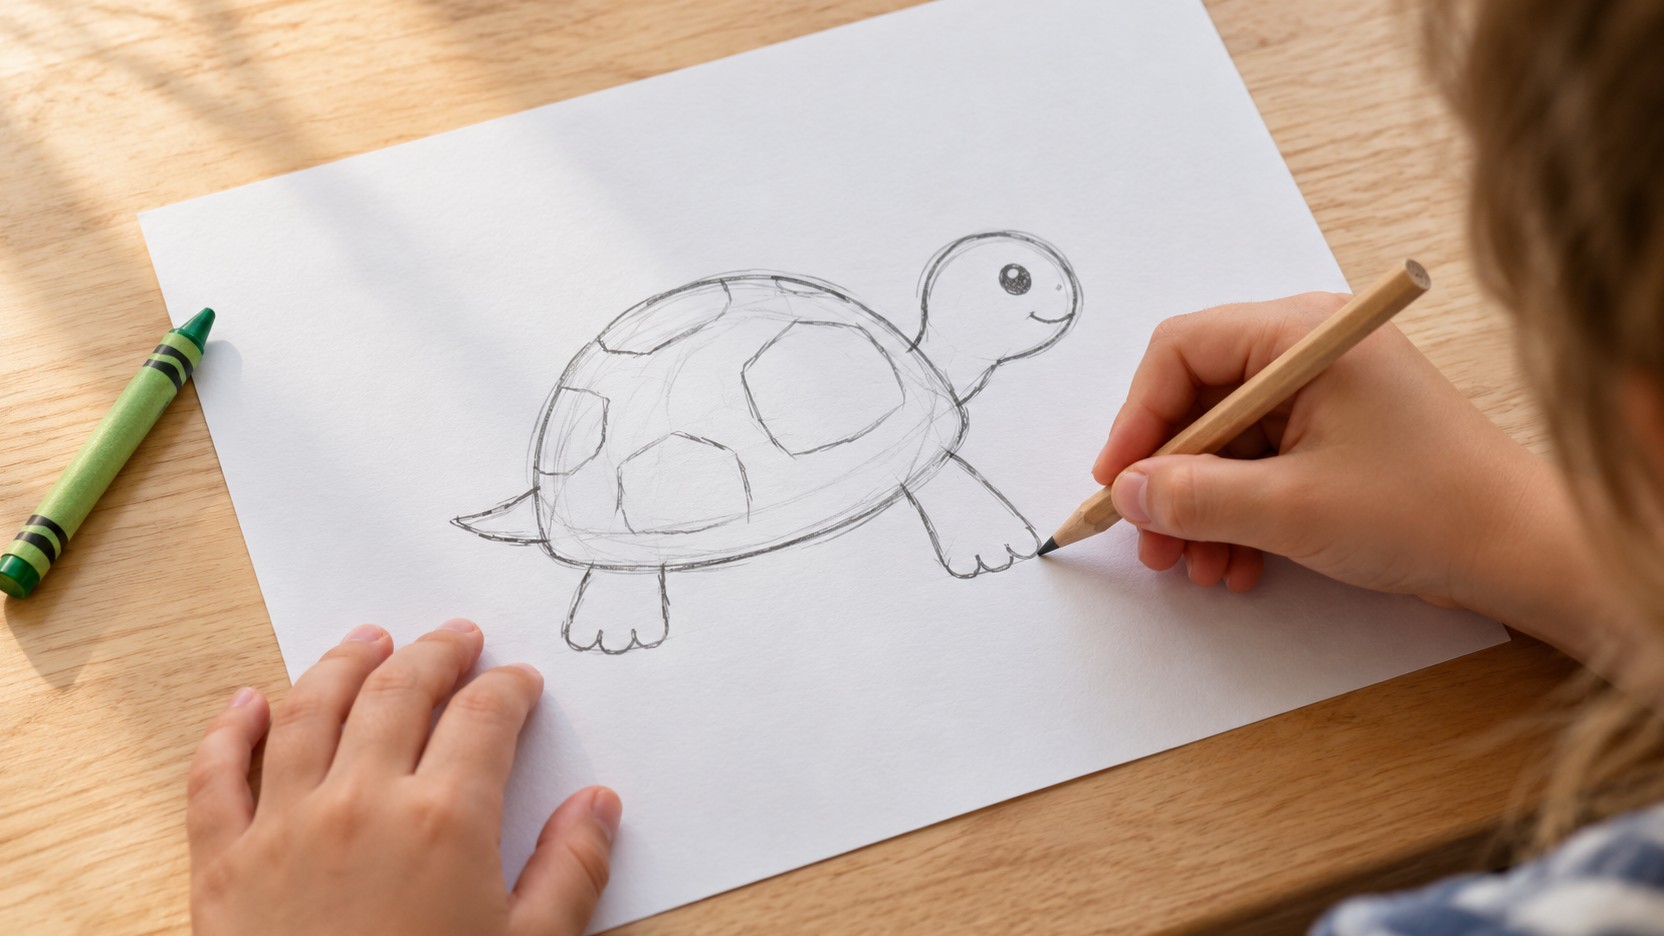
Begin with a large sideways oval for the shell, placed slightly above the middle of the page. Add a smaller rounded head extending from one short end. The head should connect to the shell area rather than float beside it. Draw two short visible feet beneath the shell and a small pointed tail at the opposite end from the head. Keep these shapes broad enough to recognize without needing tiny, precise movements.
Add an eye near the front of the head and a short curved mouth if you want a friendly expression. Draw a curved line just inside the shell’s lower edge to suggest a rim. Then divide the upper shell into a few large patches. Those patches can be irregular; they are a decorative interpretation rather than a scientific diagram. Leave some space between lines so the pattern remains readable.
Finish with a ground line beneath the feet or a few broad leaves nearby. If the turtle appears to float, move the ground line closer to the feet in another version. Try changing one feature next time: a longer neck, a taller shell, or a different walking pose. Comparing two versions can show how much a small shape change affects the animal’s personality.
Draw a Flower That Has Room to Grow
Place a small circle in the upper half of the page for the flower’s center. Add rounded petals around it, working outward without worrying about an exact count. Draw a stem down from beneath the flower head, then place a leaf on either side using two curves that meet at a point. Let the leaves attach to the stem so the plant feels connected. Add a second nearby flower at a different height if the page has room. A leaning stem or uneven petals can make the drawing feel lively. Use a few short ground marks at the bottom, or leave the flower isolated as a simple study. Choose observed colors or invent a combination you would like to see in a garden.
Draw a House With a Door That Fits
Start with a broad rectangle for the main wall. Place a roof above it using two sloping lines that meet near the middle, then connect their lower ends to the wall’s upper corners. Draw a door tall enough for the kind of character who might live there. Add a window to one side and check that the openings have a little wall space between them. Keeping the first version simple makes the overall shape easy to follow.
Add a path that begins at the door, widening slightly as it approaches the bottom of the paper if you want a sense of distance. A tree, a low fence, or a flowerpot can suggest a setting. Avoid packing every possible feature into the first drawing. Ask who uses the house and choose one detail that helps tell that story. A giant’s home might have an enormous doorway, while a tiny creature’s house could sit beneath a large leaf.
Draw a Fish With a Clear Silhouette
Sketch a sideways oval for the body, leaving room for a tail at one end. Make the tail from a broad triangle or two rounded lobes, and connect it to a narrower point at the back of the body. Add a small fin above or below the main oval. Place an eye near the front and a short curve where the mouth belongs. Look at the outline before adding patterns; the body and tail should already suggest a fish.
Decorate with stripes, large scales, or a few contrasting color patches. If several pattern types compete, choose the one you most want to emphasize and simplify the rest. Water can be suggested with a few curved lines around the fish rather than filling the whole page. Leave those marks separated from the body so the silhouette remains clear. Add another fish only after deciding where it has space to swim.
For a variation, draw a second body that is taller, longer, or rounder than the first. Keep the tail connection and eye placement understandable, then compare the effect. You can invent a species for a story, or observe a photograph when you want a more realistic fish. A tutorial’s simple shape is a starting point; real animals have many different forms worth looking at closely.
Draw a Tree With Branches That Connect
Begin with two upright lines for a trunk, widening them gently toward the bottom. At the top, split the trunk into two or three broad branches. Add a rounded canopy around the upper branches, or build several overlapping clusters of leaves. Keep some branches visible so the connection between trunk and canopy is clear. A few root-like lines near the base can help the tree meet the ground.
Choose a season or an imagined environment to guide details. A winter tree might keep its branching outline exposed; a summer tree might have dense clusters of leaves. Fruit, a hollow, or an animal visitor can provide a story detail. Draw bark with a few selected marks rather than covering the trunk with identical lines. You can return later to study a real tree and discover how its branches differ from this simple version.
Follow Four Illustrated Sailboat Stages
Read the picture from left to right: hull, mast, sail, and water. Each drawing keeps the earlier shapes while adding one useful part. Leave room above the hull before beginning so the mast and sail fit. The final picture includes a small pennant, which can remain an optional finishing detail.
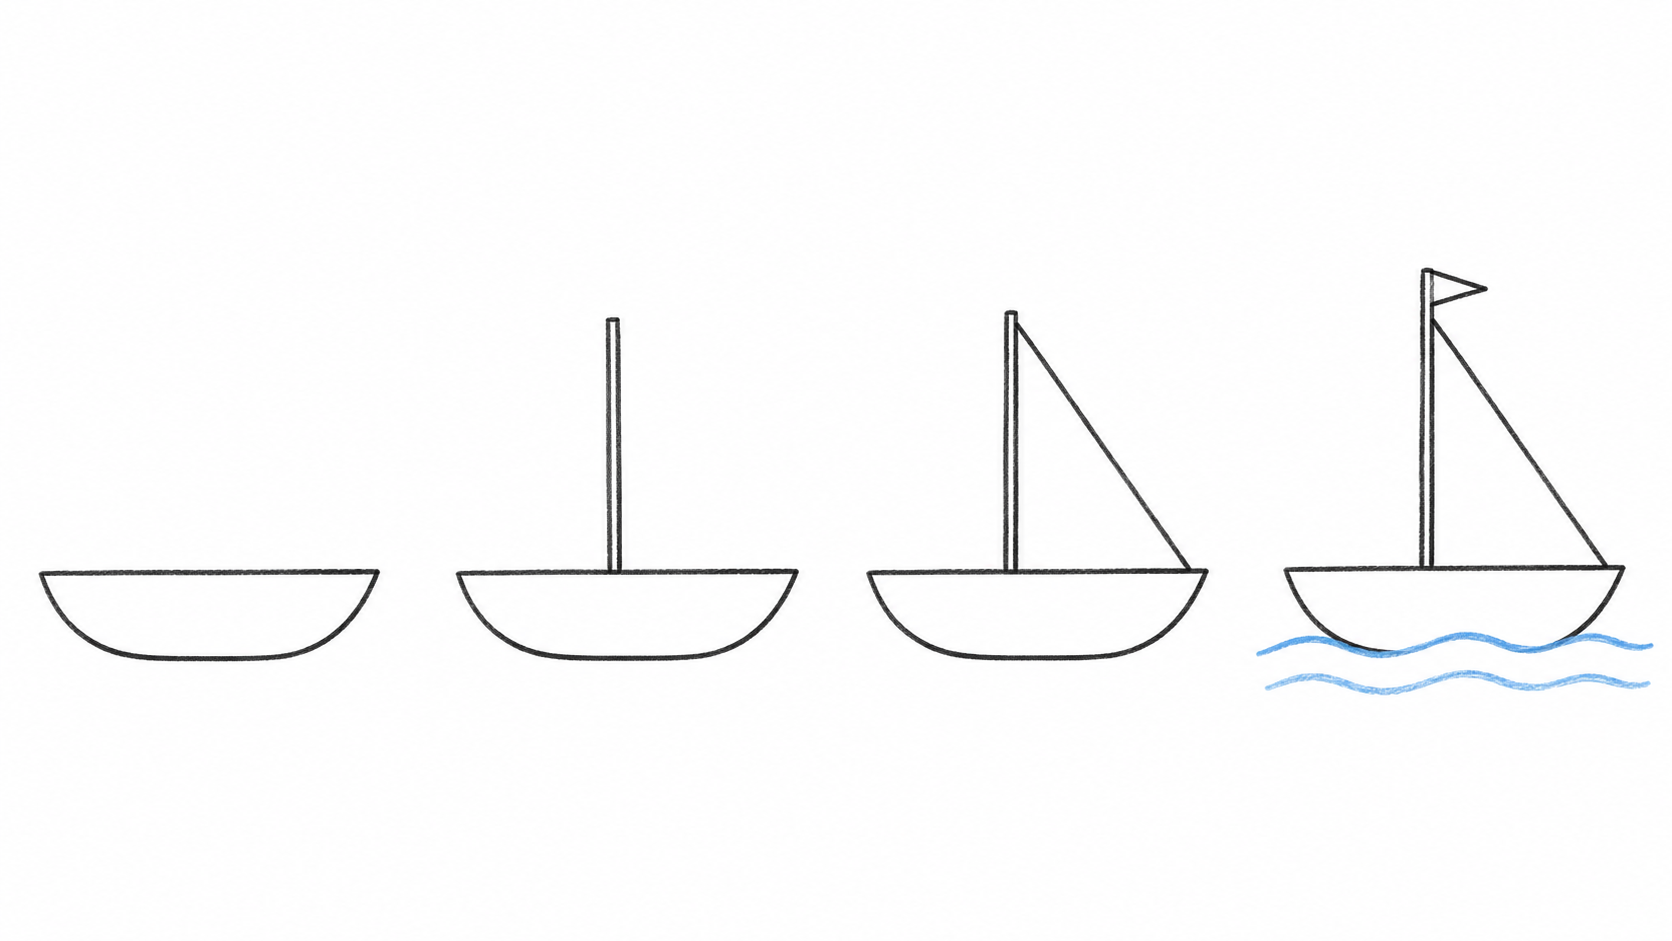
- Hull: draw a long shallow bowl and join its ends with a straight upper edge.
- Mast: add an upright line or narrow pair of lines rising from near the hull’s middle.
- Sail: draw a broad triangle beside the mast, keeping its outline clear against the upright support.
- Water: place two or three loose horizontal curves beneath the boat, with the upper waterline meeting the hull. Add a pennant or distant shore only if wanted.
Change One Shape to Make a Second Version
Repeat the turtle’s shell shape on spare paper and change only its height. Keep the head, feet, and ground in comparable places so the difference is easy to see. A lower shell and a taller shell give different silhouettes even before patterns are added. Choose the version that suits the creature you want to draw.
For the fish, keep the body similar and compare a wide triangular tail with two rounded tail lobes. Attach each tail to the narrow end of its body and leave the edge clear of nearby water marks. Notice which outline is easiest to recognize from a little farther away. The variation comes from a visible part of the tutorial rather than a demand to invent every feature again.
For a more observed version, look at a real subject or a suitable reference photograph and choose one difference to investigate. A house may have a flat roof, a tree may branch lower, or a flower may have a different petal arrangement. Keep the simple construction order where it helps, then change the feature that the observation reveals. This gives the next drawing a specific purpose without requiring a complete study of the subject.
Handle a Missed Step Without Starting Over Automatically
Suppose the flower center is too close to the paper’s edge. Some petals can extend beyond the boundary, or the drawing can become a close-up. If a fish’s tail overlaps a nearby object, the scene might show the fish swimming behind it. Look for an interpretation that fits the child’s intention before treating a mark as a mistake. Starting again remains available when a fresh version would feel easier.
Adults can help by asking about the next desired effect. Does the child want the turtle to stand lower, the tree to look taller, or the boat to sit more securely on the water? Offer one possible change and let them test it. Avoid redrawing the subject over the child’s lines. A separate demonstration gives useful information while keeping the original page available for the artist’s decisions.
Add Color After Checking the Main Shapes
Check the main connections before coloring: head to shell, leaves to stem, roof to walls, tail to fish, branches to trunk, and sail to mast. A light extra line can close an accidental gap while the drawing is easy to read. Then choose the subject’s main color and one area that should stand out. A small sample on spare paper helps if the drawing tool is unfamiliar.
For a turtle, try a medium shell color with darker patches and a lighter head. For a fish, compare a bright body against a few quieter water marks. For a house, use one repeated color on the door and a nearby flowerpot to connect the details. These are examples of a limited palette, and the child can replace the suggested colors with their own combination.
Build a darker area gradually with another layer of suitable pencil or crayon marks instead of immediately pressing harder. Leave some paper visible around the flower or boat to keep the subject clear. If the child wants a busy setting, add one group of related details, such as plants around the turtle or clouds above the house. Stop and look again before filling the remaining spaces; the new marks should contribute to the picture’s chosen effect.
Return to a Subject and Notice What Changes
Repeat a favorite tutorial on another day without requiring an exact copy of the first attempt. The child may remember a useful order, choose larger shapes, or invent a new setting. A familiar subject can leave more attention available for one new choice.
Save selected versions only with permission and compare the decisions rather than searching for a single best picture. Over time, a simple sequence can become familiar enough that the child no longer needs it. That is a natural invitation to observe more closely, combine subjects, and build a drawing around an original idea.