Make a Tray, Folder, or Picture Stand From Available Card
Choose a small job first: keep crayons reachable, protect a set of drawings, display a lightweight picture, or sort a few broad cards. The instructions below show how the intended contents determine the size, fold, divider, and opening. Use suitable clean materials already available, prepare difficult cuts as an adult, and test the working shape before decorating it. A brief trial in the place the object will live can reveal a wall that is too high, an awkward fastening, or a base that needs more width.
A: Choose one small personally relevant problem and inspect the materials already available.
A: Real contents reveal fit, finger room, and movement requirements more clearly.
A: Sides or dividers may be too high, compartments too narrow, or the base too weak.
A: Add what supports the maker's intention without blocking access, hinges, or openings.
A: Yes; make the picture removable and test the stand with suitable lightweight contents.
A: Reject unsuitable pieces and select materials that can reasonably serve the chosen purpose.
A: Agree on the needed cut or support, perform that task, and return design control to the child.
A: Check reach, fit, stability, and whether ordinary use remains easy in that location.
A: Compare a focused repair with a replacement or dismantling; the material may have reached its limits.
A: Acceptance depends on local rules and the materials attached, so check rather than assume.
Choose Through the Item You Want to Hold or Display
Put the actual item beside the available material. A group of crayons needs low reachable sides, loose drawings need a cover with space for their thickness, and a picture needs a support that fits its display position. Ask the child which job they want the object to perform. The table gives a quick starting match before the detailed instructions.
| Intended use | Material feature to look for | First check |
|---|---|---|
| Crayon tray | Broad stable shallow box | Lift the shortest tool easily |
| Drawing folder | Two broad panels or a large foldable sheet | Close around the actual stack |
| Picture stand | Sturdy card that holds a fold | Support the lightweight picture on its shelf |
| Card sorter | Container with room for broad dividers | Retrieve a card from each proposed section |
Inspect the Available Materials Before Planning the Build
Collect a small selection of clean, dry paper and packaging. Notice existing folds, flat panels, broad bases, and openings. A shallow carton may already provide a tray shape, while a larger card sheet can become a folder. Let those features suggest possibilities instead of forcing every material to imitate a commercial product. Keep the collection small enough that the child can compare its parts easily.
Reject packaging with food residue, sharp staples, damaged coatings, or uncertain contamination. Containers that held chemicals do not belong in the children’s craft supply. An adult should handle difficult cuts and inspect any prepared edges. Follow age guidance and product instructions for adhesives, paints, and tools. The CPSC Art and Craft Safety Guide is a useful reference when choosing materials.
Do not assume every saved object needs to become a project. Some material is too weak, awkward, or difficult to join for the intended purpose. Explain that limitation and choose another piece. Selecting against an unsuitable material is a legitimate design decision. It can prevent a long sequence of frustrating repairs and keep attention on what the child wants to make.
Use the Intended Contents as a Measuring Guide
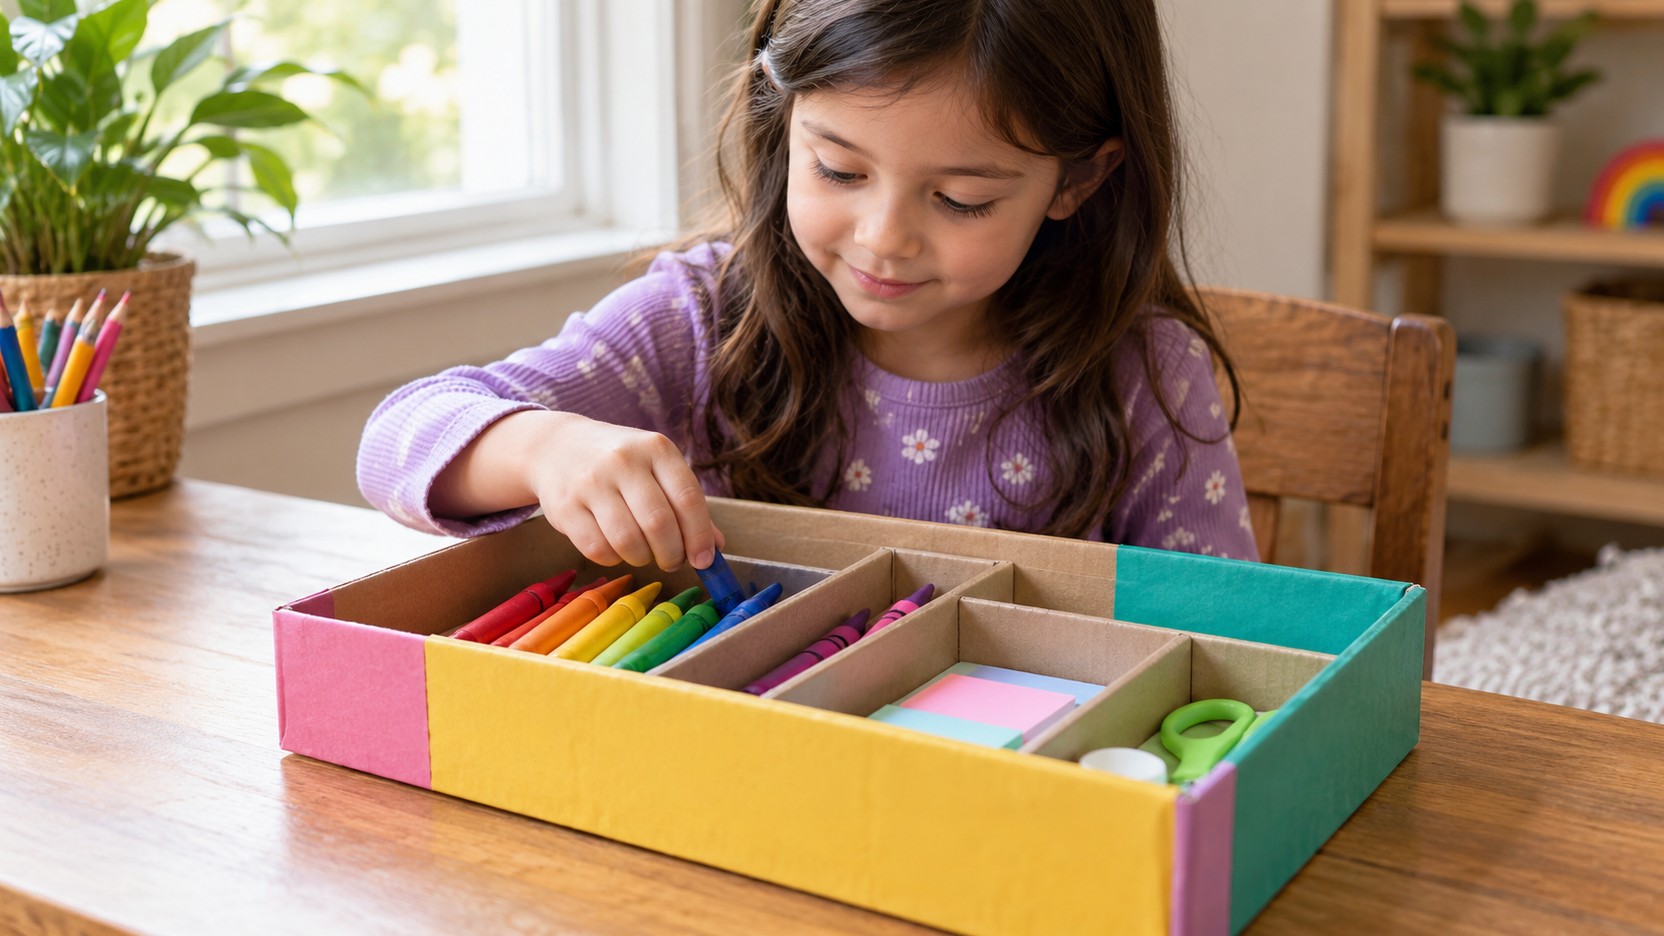
For a crayon tray, arrange six crayons side by side on a sheet of paper and draw a loose rectangle around them. Leave a finger-width of space at both ends so the child can lift a crayon without tipping the tray. Transfer that rectangle to the base of a suitable shallow carton, checking that the proposed sides will not close over it. A 20-by-15-centimeter base is a possible starting size, but the actual tools decide the fit. Try retrieving the shortest crayon as well as the longest; a tray that holds everything can still be awkward to use.
Check movement as well as fit. A folder needs to close, a drawer-like tray needs to slide, and a lid needs clearance. Try the action before attaching all the parts. If the material is folded around an object, avoid making the fit so tight that ordinary use tears the cover. A little deliberate space can make the project much more useful.
Build a Shallow Tray for Drawing Tools
Choose a clean box with a broad stable base. An adult can lower the sides or prepare the opening if the material is difficult to cut safely. Place the tools inside and decide whether one open area is enough or a divider would help. A low divider is easier to reach over than a tall wall. Test its position with the real contents before attaching it.
Make a trial divider from sturdy card with broad folded tabs along the base or ends. Those tabs provide more contact area than a narrow card edge. Attach using a suitable method and allow any adhesive to set as directed. Keep the first version simple. Decorative paper can be added after the tray holds the intended lightweight tools without blocking access.
Use the tray for a short real session and notice what changes. Perhaps the crayon compartment works but a short pencil disappears beneath a flap. The child can adjust one section in response. Practical use supplies evidence that a display photograph cannot show. A useful organizer earns its place by making the chosen activity easier, not merely by looking finished on the day it is made.
Make a Folder That Protects Rather Than Crowds
Lay the intended paper stack on a broad card sheet and mark where its sides sit. Fold the sheet around the stack with a little extra room at the spine, then remove the papers before strengthening the crease. If using two separate panels, join them with a suitable broad flexible strip that leaves room for opening and the stack’s thickness. An adult prepares difficult cuts or joins. Test inserting the papers, closing the folder, and lifting one sheet out without bending its corners. A suitable loose paper wrap can keep a light folder closed; try the action before decorating. Place the cover image away from edges that rub during use.
Create a Low Picture Stand
A folded triangular support can hold a lightweight picture at tabletop level. Use card stiff enough to keep its shape and make the base broad. Place the picture against the support and observe whether the angle and size work. A tall picture may need a wider base or a shorter display area. Keep the stand away from edges where a fall could damage something nearby.
Try a removable picture rather than gluing the artwork permanently. The child can change the display when they want, and the stand remains useful beyond one drawing. Ask where it will live before deciding its final dimensions. A narrow shelf may suggest a compact version, while a desk may allow more width. The available space becomes part of the design brief.
Turn a Container Into a Sorting System
A shallow container can hold broad picture cards, paper shapes, or other suitable lightweight materials. Decide which categories would actually help the user. Sorting by color, purpose, or current project creates different systems. Ask the child to choose a distinction they understand rather than imposing an adult’s preferred order. The best arrangement is one the intended user can maintain.
Build only as many compartments as needed. Too many narrow sections can make removal difficult and create weak walls. Test the divider layout with loose pieces first, then attach what proves useful. A picture symbol can identify a section without requiring the child to read. Keep small contents inaccessible to younger children and select larger alternatives where appropriate.
Leave room for the system to change. A removable divider may be more useful than a permanent grid if the collection grows or interests shift. Explain which parts can move and which need to stay fixed for strength. The child can then adapt the organizer without accidentally pulling apart the base. Designing for change is a practical response to how children actually use their materials.
Choose Joining Methods According to the Job
A joint that holds a flat decoration may not support an upright wall. Look at the contact area, the direction of pressure, and whether the part needs to move. Broad folded tabs, suitable tape, and appropriate glue can serve different purposes. Try a small sample with similar materials before applying the method to a valued component. Keep adult-only equipment out of the child’s task list. A simple join that suits the material is more useful than a complicated method chosen because it looks impressive.
Keep Decorations From Interfering With Use
Decorate after the main object has passed a practical trial. Thick layers can block a lid, reduce the width of a compartment, or make a flexible fold too stiff. Ask the child which area can carry an image without changing the function. A single original drawing or a deliberate color scheme may communicate the maker’s style more clearly than covering every surface with extra materials.
Keep handles, hinges, and contact edges clear where necessary. If the child wants a raised feature, test it loosely before attaching it. The feature may work on a side panel but catch when placed near an opening. These decisions connect appearance and function rather than treating decoration as something that happens after all thinking is finished. The maker can choose a different effect when the first idea creates a problem.
Reinforce the Part That Receives the Repeated Pull
Watch which area is handled during ordinary use. A folder hinge bends each time it opens, while a tray divider receives sideways pressure when a tool is removed. Test a broad reinforcement strip on similar spare card, leaving the moving fold free where needed. Position it loosely and repeat the action before attachment. A reinforcement that blocks the opening needs changing even if it makes the surface thicker. Use the appropriate joining method and setting time, with adult preparation for difficult tools. The repair should strengthen the actual contact or bend rather than cover every surface with another layer.
Test the Object Where It Will Be Used
Place the tray, folder, or stand in its intended location and try an ordinary action. Can the child reach it? Does it fit beside other belongings? Is the lid easy to open without spilling contents? Use only safe lightweight loads and avoid relying on craft constructions for heavy or valuable items. The actual setting can reveal a difficulty that did not appear on the worktable.
Choose one revision based on what happened. Lower a wall that blocks access, enlarge an opening that catches, or simplify a fastening that is awkward. Keep the child’s goal visible during the change. An adult preference for a tidier appearance should not automatically outweigh a feature that makes the object easier for its user. Practical testing helps separate those different concerns.
Plan What Happens When the Project Wears Out
Paper and card objects may eventually bend, tear, or stop fitting the intended contents. Discuss whether a small repair, a new version, or dismantling makes sense. Save useful components when practical and avoid adding endless layers to a structure that can no longer do its job. The child can compare the old design with what they now know and carry that knowledge into a replacement.
Consider disposal when choosing decorations and joins. Materials accepted for recycling vary by location, and a heavily mixed craft may be harder to separate than plain packaging. Check local guidance rather than assuming every homemade object belongs in the recycling bin. A useful project can still have a limited life. Thoughtful making includes choosing what to keep, what to repair, and what to let go.
Keep a manageable supply of clean broad materials for future ideas. The next project may begin with another small practical annoyance rather than a new shopping list. When children can notice a need, inspect a material, test a simple build, and revise one feature, ordinary household supplies become a way to practice design. The object is useful, and the decision-making remains available for the next thing they want to make.