Plan, Illustrate, and Assemble a Small Storybook
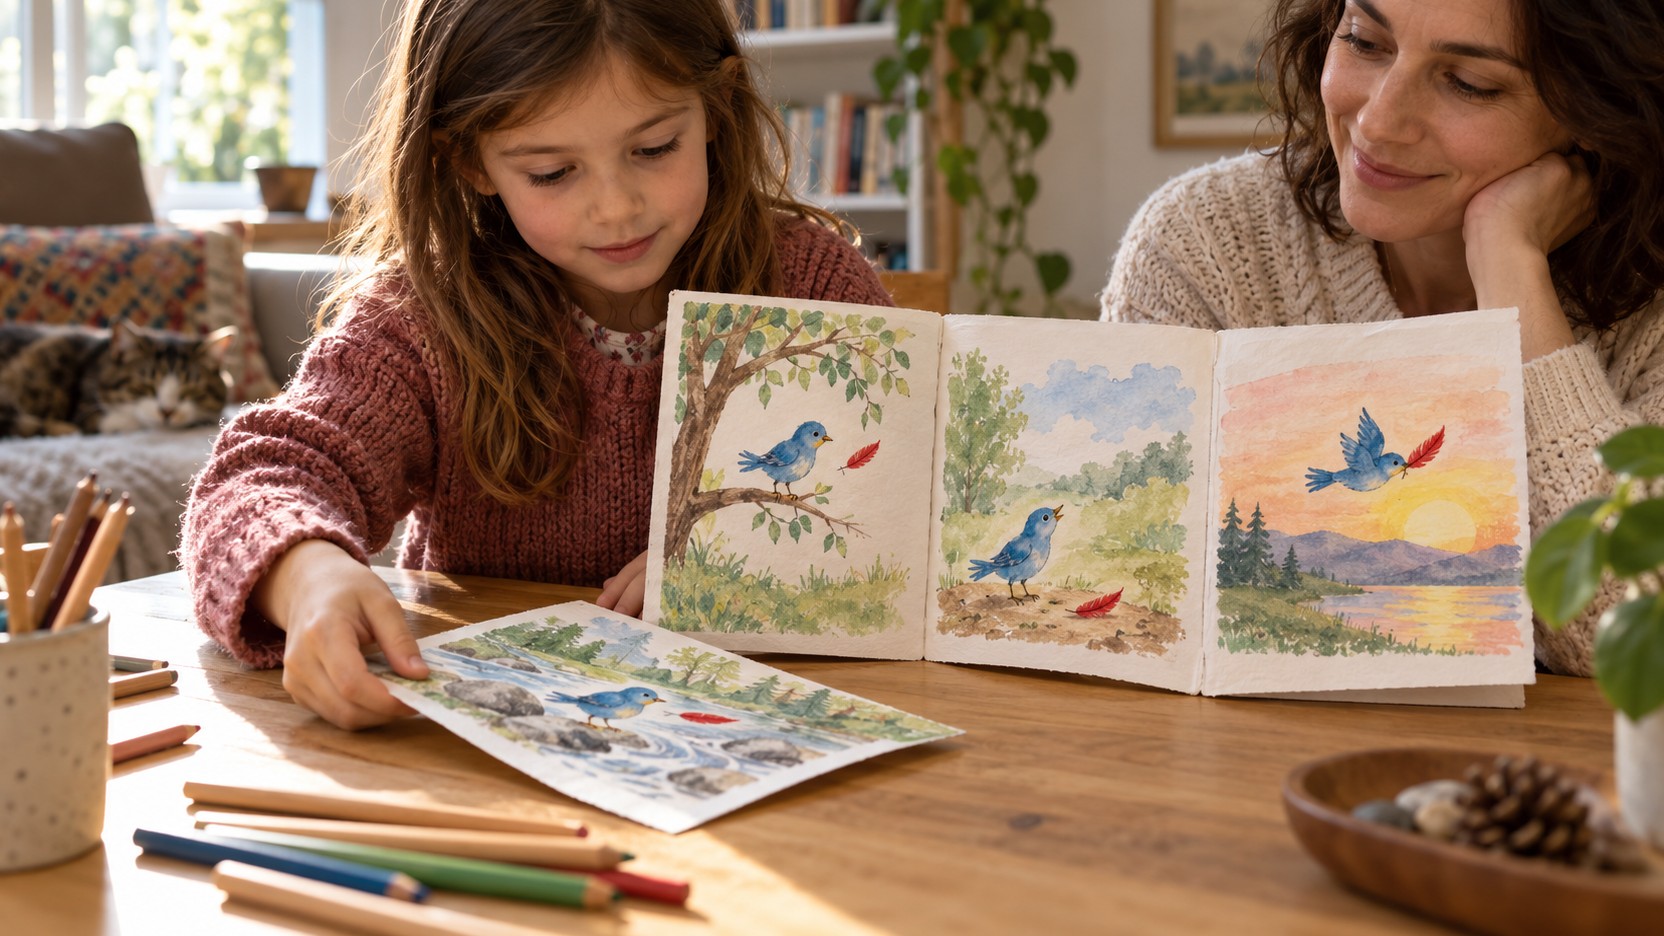
Begin with a few connected events, arrange them as rough pages, and test what a reader sees when the page turns. The eight-page example below follows a bird searching for a feather, with room for the child’s own story, images, and wording. Use simple drawing materials and an adult-prepared binding suited to the reader. The guide explains page jobs, visual clues, character consistency, and one focused reader test before the final copy. A small book gives each decision enough space to be tried and revised.
A: They can begin through telling, drawing, signing, dictation, or arranging images and develop the relationship between them.
A: Choose a small format that can carry the intended events without overwhelming the maker.
A: It shows facing pages, page turns, sequence gaps, and the timing of information.
A: A wordless sequence can work when visual relationships and clues support the intended reading.
A: Give images a job such as showing action, scale, expression, setting, or a clue.
A: Record faithfully, read back, and ask the author before changing language.
A: Check the full reading order and page behavior before permanent assembly.
A: Use feedback to understand the reading effect while leaving the final artistic decision with the author.
A: A chosen private audience or a single familiar reader can be enough.
A: Keep a selected plan or trial that shows a meaningful decision, if the maker wants it.
Choose a Reader and a Manageable First Idea
Ask who the book is for. A younger sibling, a friend, a grandparent, or the maker themselves can all be real readers. The intended audience helps with choices about image size, language, page count, and handling. It should not become a demand to please everyone. A book for one familiar reader can be a complete and worthwhile project.
Choose an idea small enough to develop through a few events. A blue bird searching for a red feather offers a clear object and a reason to move between places. Another child may prefer an ordinary family moment or a completely invented world. Start with what changes during the story rather than trying to explain an entire fictional universe before the first page.
Keep composition separate from the physical difficulty of writing. A child can tell, draw, sign, select through AAC, dictate, or arrange images while deciding what happens. Adults can record language faithfully when asked and read it back for approval. The maker’s idea should not shrink to match handwriting speed, and supported production should preserve the child’s authority over meaning.
Tell the Events Before Making Finished Pages
Invite a brief oral or visual telling. What does the character want, what happens when they try, and what is different at the end? These are planning prompts, not mandatory story ingredients for every form. A quiet observation book may organize a different kind of change. Listen for the relationship the child wants the reader to understand and help keep that relationship visible.
Use loose scraps or broad cards to represent moments. A quick sketch is enough. Move them around and let the child add, remove, or combine events. Loose pieces make sequence changes easier than revising an already bound book. Ask where the reader needs another clue rather than supplying an entire plot. The plan should remain an aid to thinking rather than a contract that cannot change.
Make a Rough Book Before the Final Copy
For a first book, fold two plain sheets together to make eight small pages, including the outside cover and back. Use the front for a title, the next page for the bird discovering its missing feather, then give searching, noticing a clue, following it, and finding the feather one page each. Reserve the last inside page for a quiet ending and the back for a small final image. Sketch with broad marks and check the sequence by turning the actual folded pages; separate loose drawings can hide a misplaced reveal. Change this map freely if the child’s story needs a different number of moments.
Give Each Page a Clear Job
Ask what the reader should learn, notice, or wonder on each page. One page may establish the bird’s missing feather, another may show a search location, and another may reveal a clue. Avoid asking every picture to introduce several new characters, settings, and actions at once. A clear visual focus gives the reader a way to follow the story without an adult explaining every connection.
Use a page turn intentionally. A character can approach something on one page and discover it after the turn. The child can decide how much information to show beforehand. Test the timing with the rough version. If the surprise is already visible across the facing spread, a different arrangement may serve the intention better.
Not every page needs the same amount of text or detail. A quiet image may deserve space, while another moment may use a short exchange. Let rhythm follow the story’s purpose. The important consistency is that the reader can understand where attention belongs and how the current moment relates to the one before it.
Plan Pictures That Carry Information
Choose what the picture tells before adding a sentence. In the feather story, place a small red shape beneath a branch while the bird looks elsewhere. The reader may notice the clue first, creating anticipation before the bird discovers it. Try the shape in two positions on rough paper: close to the bird and near the edge of the next page turn. Compare which version makes the intended clue visible without revealing the answer too soon. A wide view can establish the search place, while a closer image can make the discovery clear. Keep the useful trial beside the page plan so later detail does not hide the clue.
Keep Important Features Consistent Across Pages
Choose a few recognizable features for a returning character or object. The bird’s overall shape, blue body, and distinct wing pattern may be enough. A child can make a small reference drawing to consult while illustrating. Consistency does not require perfectly identical drawings; it gives the reader clues that the same character has returned in another situation.
Check relevant setting relationships too. A doorway should still connect to the same place unless the story intentionally changes it. A missing object should remain recognizable when found. If an illustration changes for a reason, give the reader enough information to understand the change. Let the child compare pages and choose which features matter to their own design.
Combine Words and Pictures Without Crowding
Leave room for language before filling the entire page with artwork. Text can sit in an open area or on a separate panel prepared for the book. Choose readable size and contrast for the intended audience. If an adult types or scribes, preserve the maker’s wording and ask before changing it. Correcting every phrase into an adult voice can make a neat book that no longer belongs to its author.
Read the words while looking at the image. Do both provide the same information unnecessarily, or does each contribute something? Repetition can be intentional, especially in a patterned book, but it should serve the effect the maker wants. A picture may carry the action while a short line reveals a different thought. Try the relationship in the rough copy before final placement.
A wordless book is also possible. Test whether sequence, visual clues, and character continuity give a reader enough to follow. The maker can listen to someone’s interpretation without treating every difference as failure. Some ambiguity may be part of the book’s pleasure. If an essential event is unclear, add or revise a picture rather than assuming words are the only solution.
Choose Materials That Fit the Book’s Use
Plain paper and familiar drawing tools are enough for a first copy. Heavier pages may suit paint or repeated handling, while a simple card cover can protect a small stack. Avoid adding so much thickness that pages cannot turn. Use age-appropriate supplies and adult preparation for difficult cuts or binding tools. The CPSC craft safety guide can help with material precautions. Practical handling matters more than elaborate decoration.
Bind Only After Checking the Order
Keep the folded sheets nested in the order tested by the mock-up. For a light paper booklet, an adult can use an appropriate booklet stapler according to its instructions to secure the stack through the fold, checking that the fastenings are fully closed and the finished binding suits the intended reader. Keep that tool and assembly task with the adult. A single-sheet folded book may suit a shorter story without this fastening step. Open the assembled book at every spread before adding a finished cover.
Check handling as well as order. Pages should turn freely, and important faces, clues, or words should stay clear of the inner fold. Place a rough drawing in the proposed margin before completing a detailed illustration. If the stack is too thick or the fastening cannot secure it appropriately, reduce the page count or choose a different suitable assembly. Use the final binding only after the actual materials and reading path have been tested.
Read the Book With a Willing Test Reader
Offer the rough book to a willing reader and explain how the maker wants it experienced: read aloud, with approved adult-scribed words, or as a picture sequence. Let the reader turn the pages without supplying every connection. Notice where they look for the feather, which image they return to, and whether the intended discovery arrives at the page turn.
Ask for one concrete response, such as where the reader first noticed the red shape or which event connected two search places. If an essential clue was hidden, compare moving it, enlarging it, or simplifying the nearby detail on spare paper. Try the revised section before redrawing the whole book. Keep the change tied to the intended reading experience.
The maker can keep a deliberate surprise even if the reader would prefer an explanation earlier. Compare the rough alternatives and ask which effect the author wants. Where two interpretations are welcome, the picture may need no change. Where the missing connection blocks the story, a focused visual revision gives the next test something specific to check.
Add a Cover That Represents This Particular Book
Choose a title and cover image after the story’s main relationship is clear. The cover can create curiosity without revealing every event. Let the child compare a few original options and select the one that fits. A title does not need to sound like a familiar commercial series. The book’s own character, question, place, or memorable object can provide a stronger starting point.
Credit contributions accurately. An adult scribe, translator, or helper can be acknowledged without obscuring who made the story decisions. Ask permission before sharing names, photographs, or personal details beyond the intended audience. A private copy for a familiar reader may need a different level of identifying information from a book shared more widely.
Prepare the Copy for Its Chosen Reader
Check that pages and joins are ready for handling, put the book in its agreed reading place, and explain any delicate moving feature to the recipient. A home reading basket, a protective folder, or a suitable gift envelope can each fit a different use. Ask the maker which copy should be shared and what information belongs on it. If a first reader will need help with the sequence, decide whether an adult reads along or whether a clearer picture would serve the purpose better. The book is ready when the chosen reader can follow and handle it in the way its maker intended.
Use the Next Book to Explore One New Choice
Save the rough plan if the child wants a record of how the book changed. It may show an event moved, a clue added, or a picture that began doing more of the storytelling. Those decisions can be revisited later without repeating the same plot. A second book might explore a different narrator, a wordless sequence, or a more deliberate page turn.
Keep the process manageable enough to repeat. Protect time for the child’s story and image choices, and simplify decorative production when it begins to dominate. The lasting skill is an understanding of how a reader moves through connected pages. A child who can plan, test, revise, and choose an audience has made more than a bound stack of drawings: they have shaped a book around an intention.