Choose One Situation Worth Following
Begin with a character facing a small event or problem. A turtle and a bird might want to cross a puddle, or an invented creature might discover that its favorite chair has moved. Keep the situation narrow enough for a short sequence. The child does not need to explain an entire world before the reader sees something happen.
Ask what changes by the end. The character may solve the problem, try an amusingly unsuccessful idea, or understand the situation differently. A comic can be quiet, funny, mysterious, or observational. Avoid requiring a moral lesson in every story. The maker’s chosen effect should guide the events rather than an adult’s assumption about what children ought to learn from the finished book.
Decide on a Small First Format
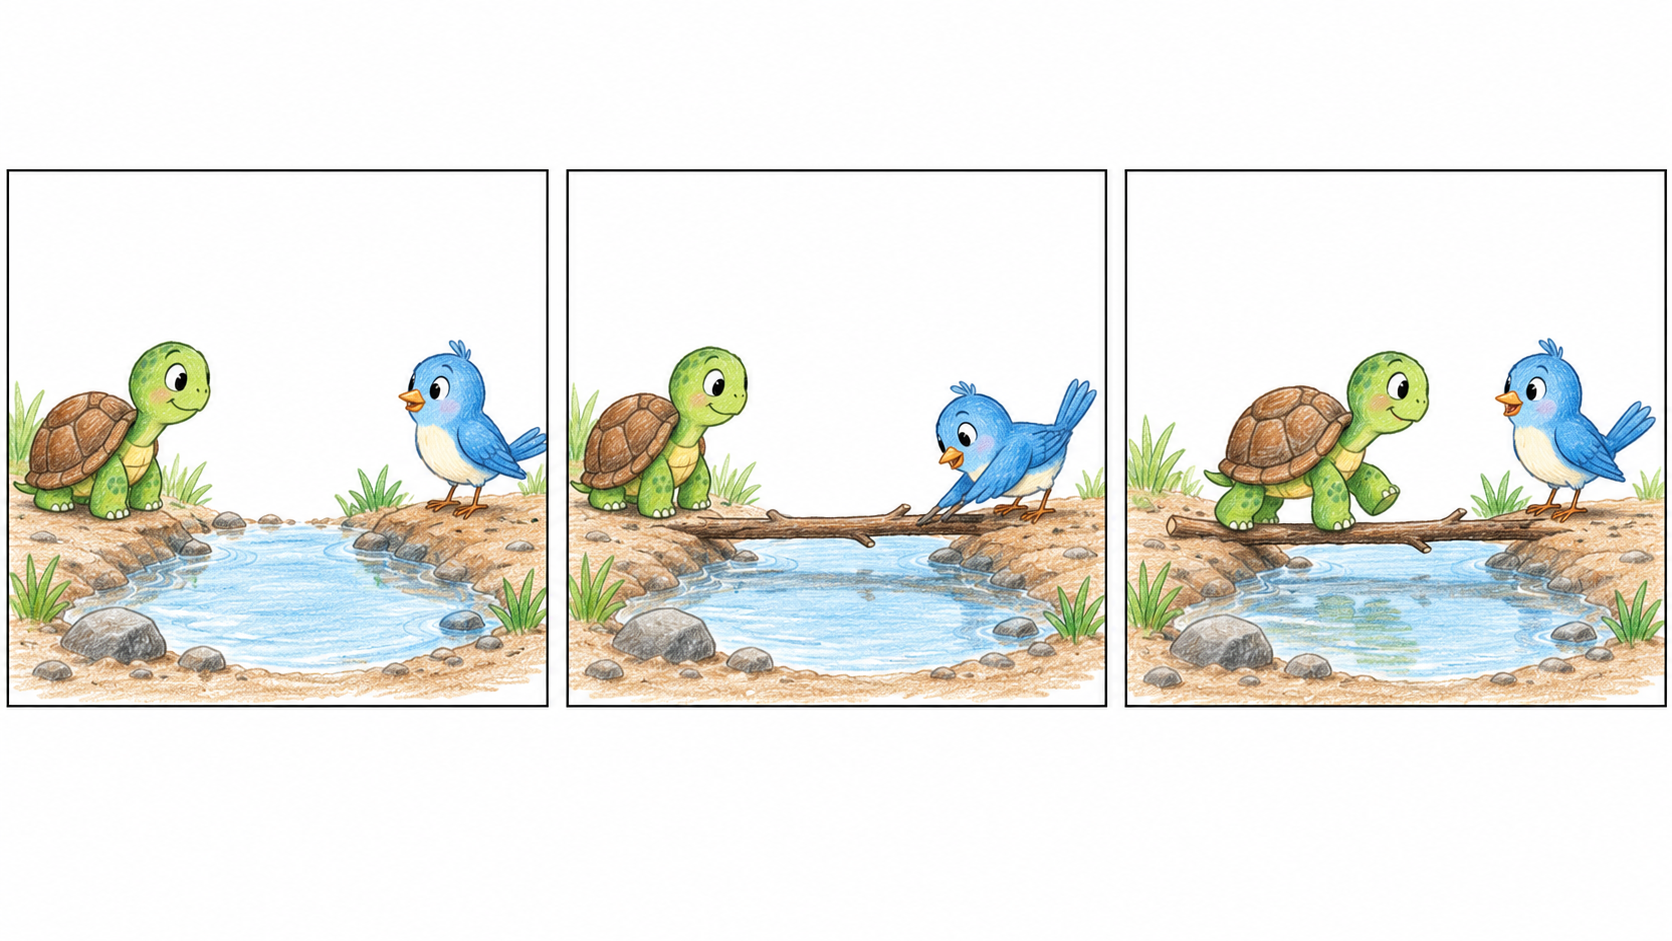
For a first page, draw three large boxes in a clear row or a simple arrangement suited to the reader’s usual reading direction. Leave visible gaps between them. Place the setup, main action, and result in those boxes using quick shapes. Check the sequence before deciding whether another panel is necessary.
Choose the reader and expected handling. A comic for a younger sibling may need larger main actions and fewer words, while a comic for the maker can use familiar private characters. Test the rough page at its actual size. A clear small format leaves more time to notice the connection between panels.
If the story needs several pages, fold a rough mock-up before creating final art. Mark the cover, the reading order, and the page turns privately on that trial. Keep the sheets in their tested arrangement while working. Facing pages can reveal an image earlier than intended, so turn the actual mock-up rather than planning only with separate loose drawings.
Sketch the Essential Moments Before the Details
The sample below uses three moments: a turtle faces a puddle, a bird places a branch across it, and the turtle crosses toward the bird. The shell, bird color, and banks stay recognizable so the changed action is easy to follow. Start with broad shapes in three boxes, leaving visible white gaps between them. Ask whether a reader can identify what the bird changed before adding feathers or grass. If the bridge appears without a clear cause, strengthen the bird’s contact with it in the middle panel. Children can borrow the three-moment structure while inventing different characters and events.
Make the Reading Path Clear
For a first comic, use an arrangement suited to the intended reader’s reading direction and experience. A simple row or clearly separated rows can be easier to follow than overlapping decorative panels. Show the rough page to a willing reader and ask where they would look next. Their path provides information about the layout before polished art makes changes harder.
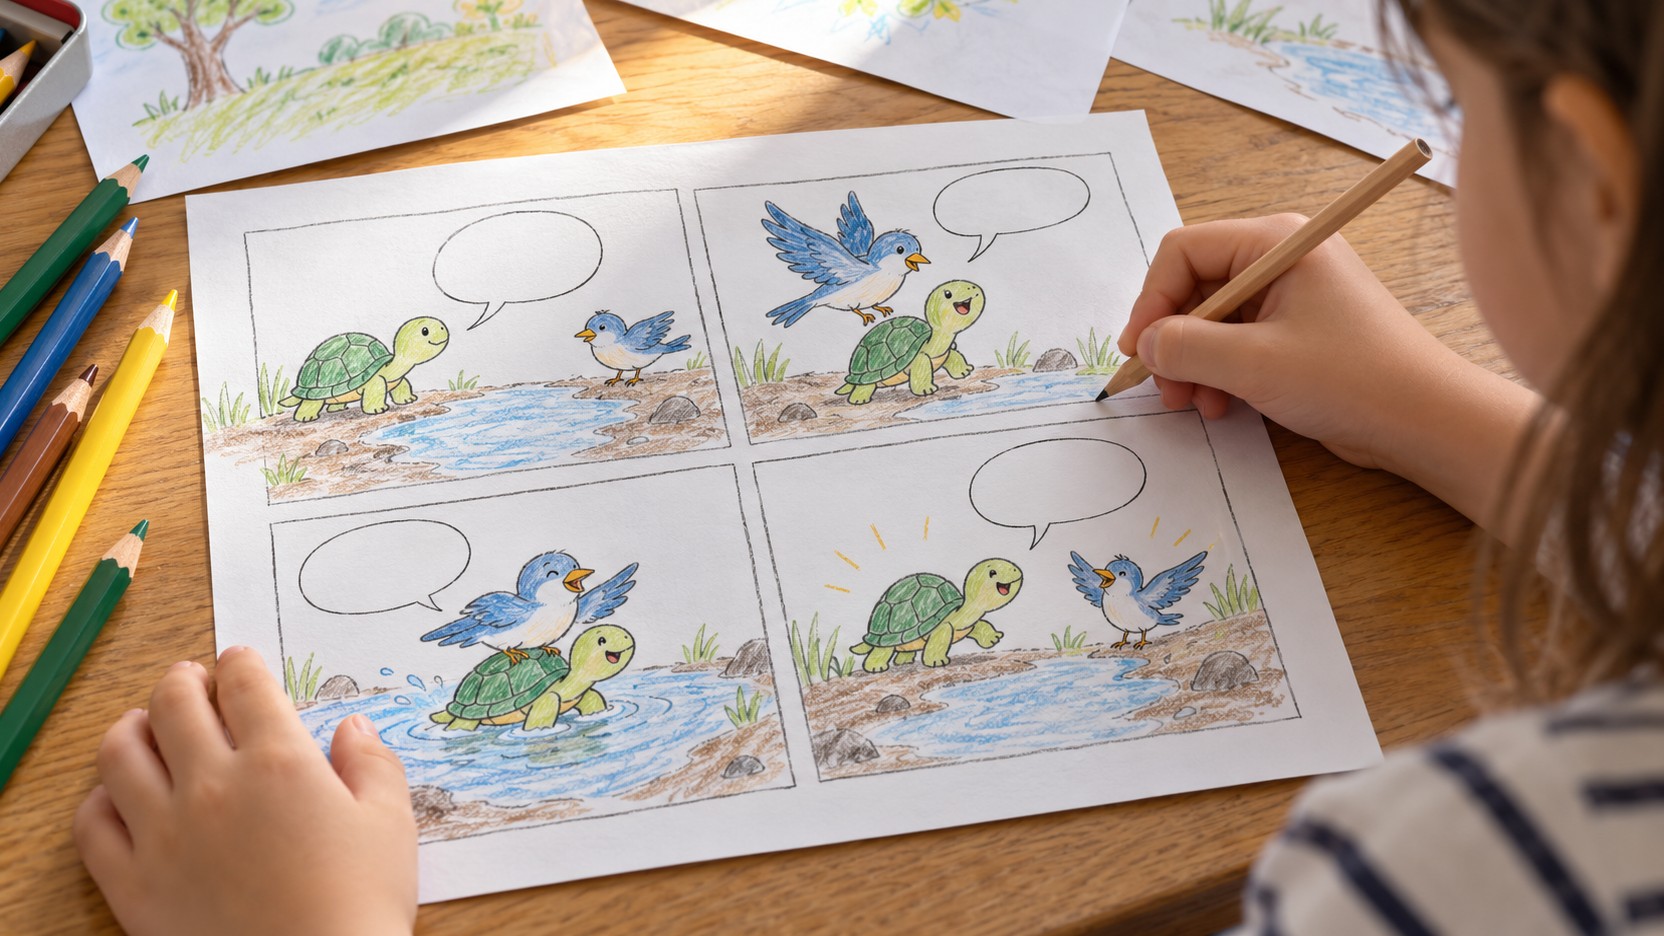
Watch the placement of speech balloons and important actions. A balloon should not pull attention into a later panel before the current event is understood. Leave room around the main subject and avoid unnecessary lines that resemble panel boundaries. Clear visual organization gives the reader more attention for the story.
Design Characters That Stay Recognizable
Choose a few features that identify each returning character: a shell shape, a beak, an unusual ear, or a simple clothing detail. Make a small reference sketch if helpful. The child can change pose and expression while preserving those features. Identical drawings are unnecessary, but the reader needs enough continuity to know who has returned.
Try two or three expressions separately before adding them to a valued panel. A gaze direction, head tilt, or mouth shape can suggest a response without many marks. Let the child explain the intended effect. Do not assign a fixed emotional meaning to every face, especially when the surrounding action tells a different story.
Keep the drawing demands compatible with the story. If a detailed costume is difficult to repeat, simplify it. If a character’s shape changes intentionally, give the reader a clue. A comic’s visual language can be loose and still communicate clearly when the maker understands which features carry identity.
Give Each Panel a Visual Focus
Ask what matters most in the current moment. A wide view can establish the puddle and the two characters, while a closer view may emphasize a proposed solution or a surprised reaction. Choose the view for its job rather than making every panel the same distance automatically. The child can compare a few broad thumbnails before settling on one.
Backgrounds do not need equal detail everywhere. Keep a landmark when it helps connect locations and simplify areas that compete with the action. An open background can make a gesture more visible. The maker may also intentionally create a busy scene, but the reader should still have a way to identify what changed.
Use the Gap Between Panels Deliberately
The reader imagines action between panels, including the turtle beginning to walk after the branch is placed. To explore timing, draw a character approaching a closed box in two panels, then spread the same approach across four smaller panels. In the longer version, use a pause, a closer view of the lid, or a reaching hand before the opening. Compare what a reader anticipates in each sequence. Neither version is automatically better: quick movement, suspense, and a humorous delay call for different choices. Keep both rough versions long enough to compare them before redrawing. If a location or action becomes confusing, add a clear connecting clue rather than adding panels only to make the comic longer.
Add Dialogue Where It Serves the Scene
Place rough dialogue before finishing the picture. In the turtle scene, the bird might say “Try this” while pointing toward the branch, leaving the image to show what the branch changes. Keep the balloon clear of the beak and the bridge contact, and direct its tail toward the speaker. Read the balloons in their intended order before adding details. A small wording change or a different balloon position may solve the crowding more easily than redrawing the whole panel.
Adults can scribe or type approved wording when needed. Preserve the child’s language and ask before editing it. A comic can also use captions, signs within the invented world, or no words at all. Choose the form that serves the maker’s intention rather than treating handwriting as the measure of narrative skill.
Balloon tails should point clearly toward the intended speaker without creating confusing crossings. A thought or quiet aside can use another understandable visual convention if the child wants it. Explain conventions as options a reader may recognize, not laws that determine whether the work counts as a comic. Test unusual choices with a willing reader.
Try Sound and Motion Marks Sparingly
A few lines can suggest a quick action, a wobble, or a direction of movement. Sound words may add another effect when language is part of the design. Use them where they help the reader rather than covering every panel with emphasis. Compare a moment with and without the added marks. The child may discover that a clear pose already communicates enough.
Keep the relation between marks and action understandable. Motion lines should support where the character or object travels, not point in several unrelated directions accidentally. A large effect can make a moment feel important, so reserve it deliberately. The goal is a visual choice that matches the event’s role in the sequence.
Test the Rough Comic Before Making a Clean Copy
Ask someone to read without constant coaching. Watch where they pause, which panel they choose next, and whether they understand the intended action. Invite a specific response such as the funniest moment or a connection that was unclear. Avoid turning the test into a judgment of drawing talent. The rough version exists to reveal what the reader receives.
Revise One Connection at a Time
Choose a change linked to the maker’s purpose. Enlarge a small clue, move a balloon, add a transition panel, or simplify an overloaded image. Try the revised section before redrawing the whole comic. A focused change can solve a reading problem without exhausting the child through repeated full copies.
For a speaker mix-up, move the balloon or adjust its tail on a rough copy, then ask a reader who they think is talking. For an unexplained journey, add a recognizable landmark or a brief transition image. Keep the test focused on that connection. The maker can compare the change with a deliberate surprise and decide which information belongs in the final sequence.
Finish and Assemble in a Manageable Way
When the sequence works, choose whether to keep the rough art, strengthen selected lines, add color, or make another copy. A polished redraw is optional. Test colors on spare paper and preserve readability around faces and words. Use age-appropriate materials and adult preparation for difficult cuts or binding; the CPSC craft safety guide provides practical precautions.
For a light folded booklet, keep the sheets nested in the order checked by the mock-up. An adult can secure them through the fold with an appropriate booklet stapler used according to its instructions, checking fully closed fastenings and suitability for the intended reader. Open each spread and check that the pages stay attached and turn freely. For a single-page comic, no binding is needed. Leave important faces, balloon tails, and words clear of any inner fold before finishing the cover.
Credit the maker and helpers accurately and agree on the audience before sharing. A scribe or production helper can be acknowledged without taking over authorship. Ask before publishing names, photographs, or personal details. The comic can remain private or be made for one familiar person; a public audience is not required for the project to matter.
Let Another Comic Begin With a New Experiment
A favorite character can return, but the next comic should offer another choice to explore. The child might try a wordless page, a slower reveal, or a different viewpoint. Save a rough layout that shows an important revision if the maker wants it. The process becomes more available when the child knows how to begin small and test a reading path.
Keep the next invitation small enough to begin on ordinary paper. One new viewpoint or a single wordless exchange can provide a complete experiment without requiring another long book. The child can keep a useful rough layout beside the new sheet and choose which discovery to carry forward. Over time, a collection of short sequences offers concrete evidence of choices about action, reading order, and pacing. Let the maker decide when a sequence has reached the intended effect and who, if anyone, should read it.