Learn Brush Loading, Water, and Color Through Small Trials
Begin with one suitable paint type, familiar brushes, paper that can handle the moisture, and a scrap sheet for testing marks. This guide explains the differences between watercolor and poster paint, then shows how to load a brush, control an edge, mix colors, and build a landscape in three main areas. Try the technique on the scrap before using it in the picture. The same small trials also help explain what happened when paint spread, a color became muddy, or a layer needed more drying time.
A: Either can work; choose one suitable product and learn its behavior before adding more materials.
A: Thin paper may struggle with repeated moisture; a heavier painting surface is often more forgiving.
A: Use enough for the intended mark and test it on scrap paper rather than loading a large dripping blob.
A: The sky may still have been wet, allowing the new color to spread.
A: Yes; compare it with the intended effect and decide whether it serves another part of the picture.
A: The brush may need water, pigment, or both; a small test helps identify the adjustment.
A: Use a suitable smaller brush for selected details or simplify the detail to fit the available tool.
A: Wait when distinct edges matter; allow wet areas to meet when blending is intentional.
A: Stop scrubbing that area and let it dry or move the experiment to a fresh suitable sheet.
A: Notice a new understanding or choice, such as controlling a stroke or choosing when to let a layer dry.
Choose Materials for the Kind of Painting You Want
Start with paints intended for children and follow the product’s age and use guidance. Watercolor pans and washable water-based poster paints offer different experiences. Watercolor often allows the light paper to show through, while a thicker poster paint can cover earlier marks more strongly. You do not need both at the beginning. Choose one material and spend time finding out how it behaves before introducing another set with different cleanup and surface needs.
Use paper that can tolerate the planned amount of moisture. Thin printer paper may curl or tear during repeated wet brushing, while heavier painting paper is more forgiving. A reusable protective mat helps define the area, and a stable water container reduces spills. Set out a modest quantity of paint rather than filling every available container. Small amounts make it easier to notice what is being mixed and to refresh a muddy color without wasting a large supply.
Keep painting supplies separate from eating and drinking items. Read the CPSC Art and Craft Safety Guide for practical material and tool precautions. Avoid assuming that a household liquid is suitable paint because it produces color. Children should use materials as intended, with adult supervision appropriate to their age and behavior. Wash hands after the session and store supplies where younger children cannot access them independently.
Prepare a simple test area before opening the main painting sheet. Put a small scrap beside the palette, leave a clear place to set the brush, and agree on which cup is for rinsing. Let the child help arrange these positions. A painter who understands the setup can reload or rinse without interrupting every decision to ask where something belongs. Check the reach from the seat as well: a container that is easy for an adult to reach may be awkward for a child leaning across wet work. Rearranging the table early is easier than rescuing a picture from repeated accidental drips later.
Get Comfortable Holding and Moving the Brush
A useful brush is one the child can hold comfortably and move without fighting the tool. A broad brush covers a large area more easily than a tiny detail brush, while a smaller one can help with selected marks. Try a few strokes on spare paper: pull the brush, turn it gently, and lift it at the end. Notice how pressure changes the width of the stroke. Avoid scrubbing hard enough to damage the bristles or paper. If grip or reach makes painting difficult, change the handle, paper position, or stabilizing surface before assuming the child needs a simpler idea.
Load Enough Paint for the Next Mark
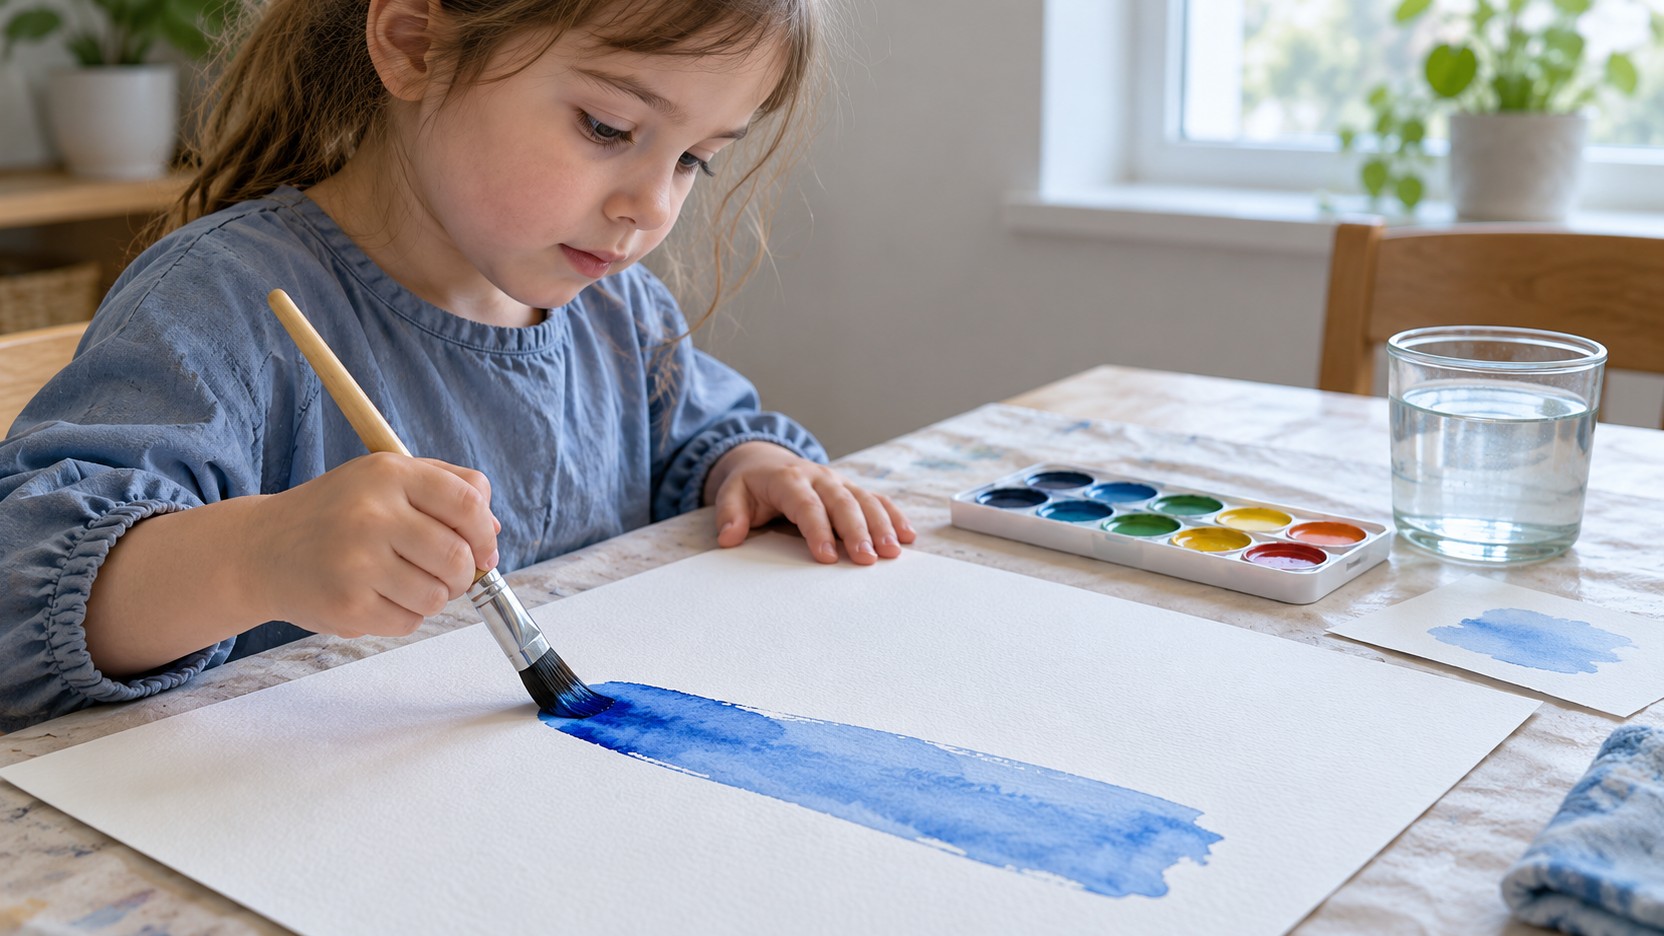
With watercolor, moisten the brush and work a little water into a paint pan. Test the resulting color on scrap paper. If the stroke is extremely pale, gather more pigment; if the brush feels dry and drags, add a small amount of water. Explain the relationship through what is visible rather than a fixed recipe. Different paints, brushes, and papers require slightly different adjustments, so the trial mark gives useful information.
With thicker water-based paint, start with a modest coating on the brush rather than a large hanging blob. Touch the brush to the palette edge if excess paint is likely to drip. A loaded brush should make the kind of mark the child intends: broad coverage, a short stamp, or a controlled line. Keep a scrap area available throughout painting, since a brush that worked well a moment ago may need reloading or rinsing.
Use Water Deliberately
Water is part of the technique rather than merely something for cleaning brushes. A damp surface can let watercolor spread into soft edges, while a dry surface usually gives a more distinct first boundary. Try both on a spare sheet: brush one patch with clean water, leave another dry, and add a little color to each. Watch how the paint moves. Keep the trial small so it is easy to see the difference. If water pools heavily, pause and let the paper settle instead of adding repeated layers immediately.
Make Color Mixing Easy to Follow
Make a small mixing study with yellow and blue. Leave one clean patch of each on spare paper, then draw a little blue into a separate yellow mixture. Paint a sample, add a little more blue, and paint another beside it. Compare the changes rather than aiming for a single named green. The actual pigments affect the result, so the samples explain these paints better than a universal recipe.
Keep a clean brush or rinse thoroughly when returning to the original colors. Remove excess rinse water before collecting another load so the next mixture does not suddenly become much paler. If the child wants to mix freely, set aside a separate experiment area. The original pans or paint portions can then remain available for a deliberate color choice in the main picture.
If a mixture becomes more muted than intended, identify which colors entered it. It may suit a tree trunk, distant ground, or a shaded area, so try a small patch beside the planned subject. For a clearer green, begin again with the clean two-color mixture and compare the two samples. Keep the successful patch near the palette as a reference. This gives the child a repeatable process instead of asking them to remember exactly how an accidental mixture happened.
Try a Simple Landscape With Three Main Areas
Gather suitable paper, a broad brush, a smaller brush if wanted, water as appropriate for the paint, and three or four colors. Choose a place with a clear sky, distant area, and foreground. Start by placing the horizon, then paint the largest sky and ground shapes. With watercolor, a pale first layer leaves room for later dark marks; with suitable opaque poster paint, test coverage on spare paper before deciding how to build the layers.
Let the first layer dry when a clear later edge matters. Add one distant shape, then a stronger foreground feature, such as a broad tree or rock. Keep its contact with the ground visible and use only a few texture marks where they help. If the background competes with the main subject, compare a quieter surrounding area before adding more detail. The child can invent the setting or stop with the three broad areas. Finish by choosing which effect to try again, rather than requiring every landscape to resemble an adult example.
Know When to Pause for Drying
Touching a damp painted area with another wet brush can move or lift color. That can be useful for softening an edge, but it can also disturb a layer the child wanted to keep. Set the picture flat in a safe place and work on a separate study while waiting. Avoid piling damp pages together. Drying time varies with paint thickness, paper, room conditions, and water quantity, so check the actual surface instead of relying on a universal countdown. The pause can become part of the plan: paint the background today, then decide on a foreground detail after it is ready.
Add Texture With the Brush You Already Have
One brush can produce several textures through changes in motion. Short taps can suggest scattered leaves; broad sideways pulls can suggest water; a lightly loaded brush can leave broken marks across textured paper. Test the action before placing it in the picture. Keep the first texture area small, then step back to see whether it supports the subject. Repeating the same mark everywhere can make important areas difficult to distinguish.
Choose texture according to the effect wanted. A calm pond might use a few long marks, while a shaggy creature might need short directional strokes. You can paint an entire study that explores texture without making a recognizable scene. Give that experiment its own purpose rather than treating it as leftover practice. Children may discover a mark they later want to use in a story picture or another material.
Respond When Paint Spreads Somewhere Unexpected
First, pause and look at what happened. Was the brush overloaded, was the paper already wet, or did two colors meet before either dried? The answer suggests a next step. The child might wait, change the area into a different shape, or begin a separate version. Avoid repeated scrubbing in an attempt to restore bright paper, since that can weaken the surface and create more frustration.
For a spill, move the painting away from the wet area if it can be handled safely, then follow the product’s cleanup instructions. Keep a suitable cloth ready and the route to the sink clear. Review the physical cause before starting again: a rinse container may need a wider base, a palette may sit too close to an elbow, or the brush-rest position may cross the picture. Move the awkward item and test the reach with dry tools before returning to wet work.
When a child dislikes an effect, ask what they intended. They may want a sharp outline rather than a softer edge, or a brighter color rather than a muted mixture. Demonstrate that one technical choice on scrap paper. Returning control to the child lets them decide whether to revise the current picture, try the technique elsewhere, or stop. A painting session can produce useful knowledge even when its first plan changes.
Choose the Brush Mark That Solves the Picture’s Next Need
Look at the next area before choosing the tool movement. A wide sky needs a different mark from a narrow branch or a scattering of leaves. Try a broad pull, the brush’s tip, and a few light taps on the scrap, then choose the one that suits the area. An adult can demonstrate the movement on separate paper while the child decides where it belongs. Keep that small sample nearby so the explanation remains visible when the brush is reloaded.
Finish in a Way That Makes Returning Easy
When the child is ready to stop, move the work to a safe drying place and clean brushes according to the paint manufacturer’s guidance. Rinse away paint before it dries into the bristles, reshape them gently where appropriate, and avoid leaving the brush head crushed beneath a heavy object. Close paint containers and separate useful leftover quantities from contaminated mixtures. Put cleaned tools where they can dry and remain accessible for the next supervised session.
Invite one brief reflection: which mark or mixture would you like to try again? The answer can guide the next invitation more effectively than selecting a new elaborate theme. Save a small technique sample beside the finished picture if the child wants a reminder. Beginner painting becomes more manageable through repeated experiences with the same materials, each adding one clearer choice about water, color, timing, or the movement of a brush.