Turn a Garment, Box, or Folder Into Something With a New Use
Try a cloth cover from an agreed outgrown garment, a portable story setting from a sound box, or a changing exhibition inside a spare folder. Each project uses an existing feature—a hem, hinge, or broad panel—and tests the new job before finishing. Choose an object its owner is ready to change, screen the material, and prepare difficult cutting as an adult. The instructions below show removable backdrops, corner pockets, trial fits, and the checks that keep the transformed object usable.
A: A deliberate new purpose gives the transformation a practical design problem to solve.
A: Ask permission and agree on the changes before cutting, covering, or dismantling it.
A: Choose a sound suitable object when damage prevents safe or useful redesign.
A: With permission and appropriate adult preparation, broad clean fabric can form a cover or backdrop.
A: A small trial reveals fit and movement problems before permanent alterations affect the valued object.
A: The maker can intentionally preserve a familiar color, fold, texture, or edge.
A: Observe actual use and respond to the user's specific difficulties.
A: Consider added materials, usefulness, durability, and disposal rather than assuming a guarantee.
A: Removable parts and a clear understanding of the base can support another redesign.
A: Record the changed feature and why it improved the object's use, with the maker's permission.
Distinguish a New Purpose From a New Surface
Painting a box may make it more personal, but an upcycling project becomes more interesting when the child decides how the object will work differently. A box can gain a removable stage front, an old folder can become a flat portable gallery, or a clean worn shirt can provide fabric for a protective cover. Ask what has changed about the object’s use. The answer gives the project a purpose beyond covering the original surface with more materials and calling it transformed.
Choose an Object the Household Is Ready to Change
Ask permission before using clothing, books, containers, or artwork that belongs to someone else. An item that appears unused may still have sentimental value or another planned purpose. Children should receive the same respect for their own belongings. Do not cut a favorite shirt or dismantle a model as a surprise improvement. Agree on what can change and which features, if any, should remain recognizable.
Prefer an object that is sound enough for the intended redesign. A weak base may not become reliable merely because it is covered with fabric. Inspect seams, folds, edges, and surfaces. Reject contamination, sharp damage, mold, and other unsuitable conditions. Choosing a different object can be more practical than investing a long session in something that cannot safely serve the new job.
Choose the Transformation and Its Working Test
Put the real lightweight contents beside the object. A booklet shows how much room the cloth cover needs; intended figures show the size of the story opening; and original drawings determine the exhibition’s pocket spacing. Test against those objects instead of relying on an imagined size. The first arrangement can stay loose while the fit is checked.
Define the action that will tell you the redesign works. Open and close the covered booklet, remove and replace the backdrop, or take one drawing from its pockets. Check the action before adding decoration or making the whole set of parts. A small trial can reveal the most important change early.
Choose where the object will be kept and how it will travel. A portable scene needs a packing arrangement, while an exhibition folder needs room to close around its contents. Let that location inform the size and removable features. The maker can then choose among colors and layouts that meet the actual use.
| New job | Feature to build first | Test before finishing |
|---|---|---|
| Book cover | Loose fabric wrap and fold | Book opens without the fabric pulling tight |
| Story box | Broad sliding-backdrop guides | Panel inserts, removes, and packs inside |
| Exhibition folder | Corner pockets for an actual drawing | Picture removes without tearing or bending |
Inspect Materials and Separate Adult Preparation
Clean suitable objects according to their material needs and allow them to dry before art use. An adult should handle difficult cutting, sharp tools, and any preparation beyond the child’s safe readiness. Use appropriate art supplies as directed and consult the CPSC craft safety guide when selecting tools and materials. Reused does not automatically mean safe, especially when the object’s history or coating is uncertain.
Mark a proposed opening or fabric piece before cutting. An adult can prepare a difficult edge while the maker checks the position against the intended contents. Keep a spare offcut from the same material for a fold or adhesive trial. After cutting, inspect the prepared edges and arrange the parts in their assembly order. This leaves the size, layout, and fit available to test before any permanent change is made.
Try a Cloth Cover From an Outgrown Garment
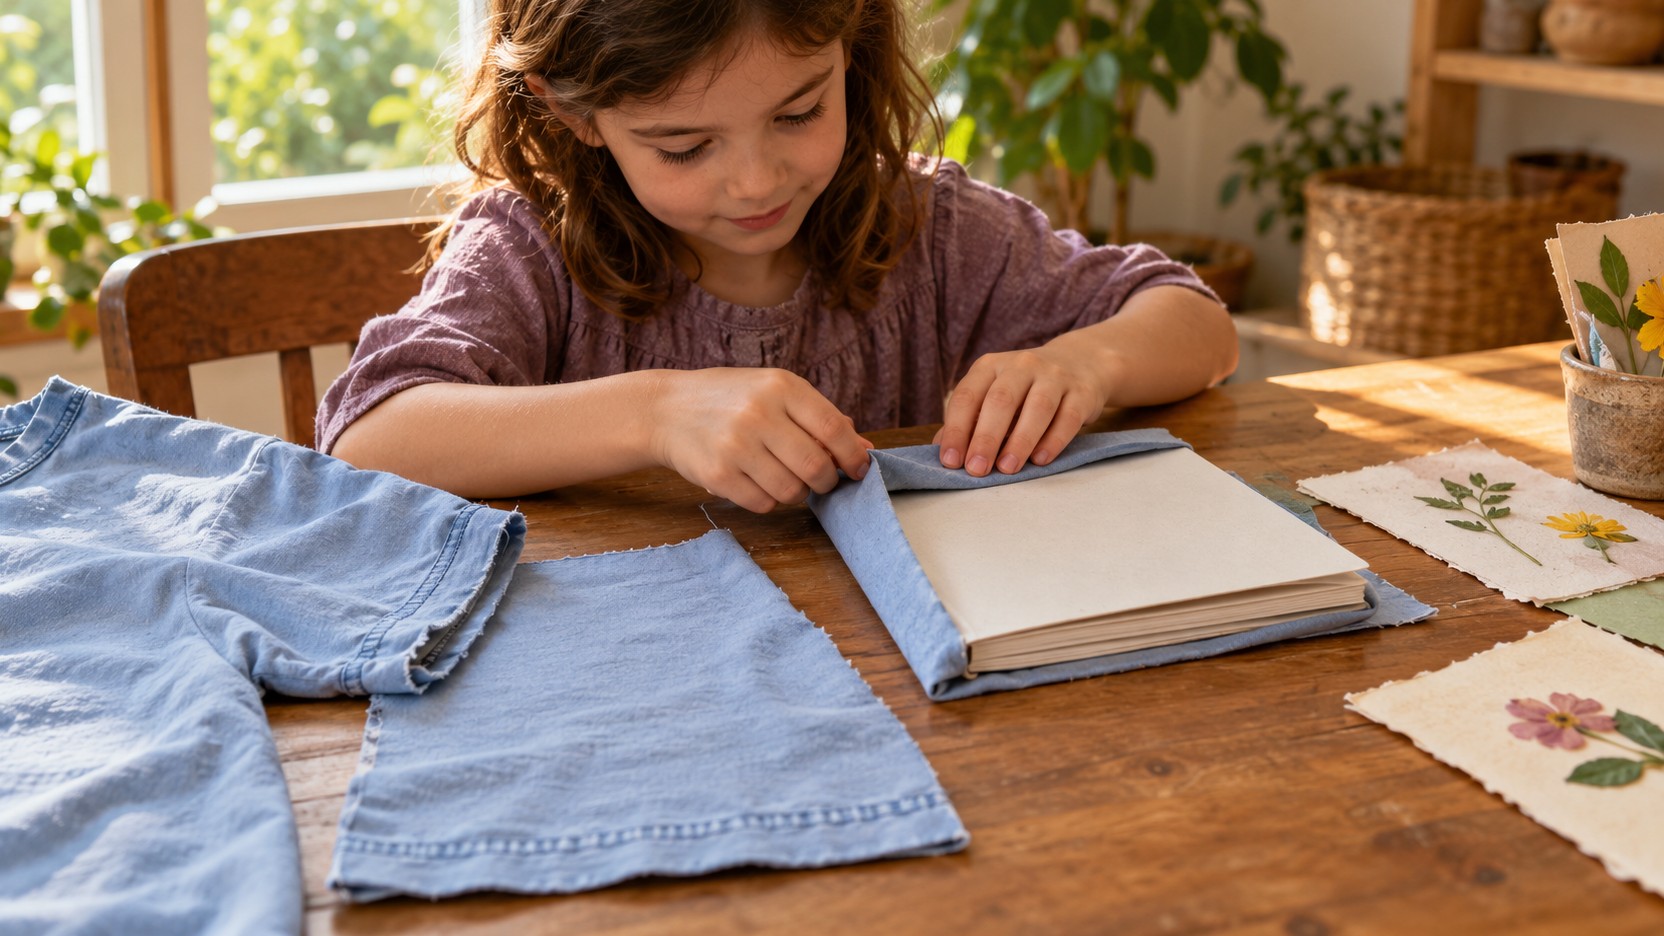
Choose a clean suitable garment the owner has agreed to repurpose. An adult can prepare broad fabric pieces where needed. Wrap a trial piece around a sturdy card cover or a handmade booklet, checking the thickness and opening action before attaching anything. A loose removable wrap may serve the purpose better than a permanently glued covering. Stretchy cloth may pull differently from a stiff woven offcut. Try opening and closing the covered booklet several times while the fabric is still loosely positioned. If the edge slides, compare a broader fold with a different fabric orientation. The child can choose the version that stays comfortable in use rather than tightening the cover until the booklet no longer opens easily. Keep long ties and small loose fasteners out of a young child’s design. The original hem, color, or familiar texture can remain visible, giving the new cover a connection to the earlier object without requiring the whole garment to remain intact.
Redesign a Box as a Portable Story Setting
Use a clean shoebox with its open side facing the players and its base forming the back wall. For a removable backdrop, fold two broad strips of card into shallow channels and tape their outside edges to the side walls, leaving the channels facing inward. Slide a light card landscape between them, trim it to fit with adult help, and pull it out before packing the scene. Make a freestanding tree from a folded card base rather than fixing every element to the box. Test opening, carrying, and setting down the box before adding more scenery; loose figures may need a separate broad storage pocket.
Design storage into the scene. A loose background can fold flat, and broad scenery panels can fit inside when play ends. Avoid adding details that prevent the box from closing unless an open display is the intended use. Let a first game reveal what the setting needs. The redesign succeeds when it supports the child’s story and remains manageable afterward, not simply when it looks elaborate on the worktable.
Turn a Spare Folder Into a Personal Exhibition
Open a spare folder flat and position two drawings inside, leaving its center fold clear. Cut four broad paper corner pockets for each drawing, fold their outside edges under, and tape only those folded edges to the folder. Slip the drawing’s corners into the pockets so the artwork can be removed without peeling tape from its surface. Try one scrap sheet first to check the pocket spacing and the closed folder’s thickness. This attachment serves a changing exhibition; it does a different job from the box’s sliding backdrop and the cloth cover’s wrap.
Arrange the pieces loosely before adding pockets or holders. Ask what the viewer should notice first and how the folder opens to reveal the collection. The order can tell a story or compare versions of one idea. Avoid fixing personal artwork permanently without the maker’s permission. A changeable display can continue to serve new interests long after the first collection is complete.
Test the folder in ordinary handling. Does it close without creasing the pictures? Can the child remove one piece without pulling out the others? Are raised decorations catching on the opposite panel? Revise those practical details before finishing the cover. The exhibition’s design includes access and protection as well as appearance.
Prototype the Changed Feature Before Committing
A trial version can isolate the part that matters most. Test a cloth fold with a spare piece, try a removable scenery guide on scrap card, or arrange a pocket with temporary positioning. Use materials similar enough to reveal the likely behavior. The trial should answer a real uncertainty rather than become a second fully decorated project.
Compare at least two workable possibilities when the decision remains unclear. A removable panel may pack better, while a fixed panel may be easier for the intended user to handle. Ask the child which tradeoff serves the purpose. The more complicated version is not automatically the more thoughtful one. A successful redesign can be simple because it understands the job clearly.
Preserve a Meaningful Trace of the Earlier Object
A familiar color, fold, fabric texture, or printed illustration can connect the new object to its earlier life. Ask whether the maker wants that connection visible. An outgrown shirt’s hem might become an edge on a cover, while a box’s existing hinge might remain the new setting’s opening. Keep private information and unsuitable printing out of the project. The point is a deliberate design choice, not an obligation to display every mark of wear or every feature of the original.
Finish for Use Rather Than for a Photograph
Choose finishing details that survive the intended ordinary handling. A thick decoration near a hinge may make a cover difficult to open, while a fragile extension may prevent storage. Try additions loosely before attaching them. The child can choose a different location or a simpler visual effect when the first arrangement creates a practical problem.
Allow suitable adhesive and paint to dry according to instructions before testing the finished object. Keep craft constructions away from heavy loads, heat, food contact, and other uses their materials cannot support safely. A homemade transformation should have a modest appropriate purpose. Clear limits help the child understand what the object is designed to do.
Evaluate the Transformation Through Actual Use
Use the object in its intended setting and notice specific behavior. A cover may slip, a storage section may be difficult to reach, or a scene may need a clearer way to hold loose components. Ask the user what worked and what interrupted the activity. Their experience should guide the next revision more than an observer’s preference for a tidier appearance.
Make one focused change and test again. A wider pocket, shorter overhang, or simpler closure may resolve the problem. Keep the original purpose visible so the project does not accumulate changes unrelated to use. If the material cannot meet the requirement, choose a more suitable job or another base object. Recognizing that limit is useful design thinking.
After ordinary use, inspect the part that receives repeated movement. The cloth may slip at one fold, a backdrop guide may narrow, or a corner pocket may lift from the folder. Change that feature and try the same action again before adding another repair. Keep parts separable where the design allows, and check local disposal guidance when a component reaches the end of its useful life.
Plan for Another Change When Interests Move On
A portable setting may later become storage, and a display folder may hold a different collection. Removable parts can make that transition easier. Discuss which elements can be reused and which have reached their limits. Ask before dismantling something the child still values. Upcycling is a series of decisions about use and meaning, so the maker’s relationship to the object remains part of the process.
Keep the Redesign Knowledge Available
Save a brief sketch or a photograph with permission if the child wants to remember the transformation. Show the changed feature and the reason for it, rather than recording only a polished final view. The record might note that a removable cover packed better or that a broader base made the display more stable. Those discoveries can inform a different project later.
Return useful leftover pieces to a manageable supply and clear out damaged or unsuitable material. The next upcycling idea may begin with noticing another object whose earlier job is finished. When children can ask permission, identify a purpose, test a change, and evaluate use, old belongings become opportunities for thoughtful redesign. The most impressive result is an object with a new role that makes sense to its maker and household.